Pocket Page Scrapbooking #3 — way delayed update!
Well, friends — this blog had gone dormant after July 13, 2014! I find as I set about to resurrect it that I had drafted a post back on July 13, 2014, but never posted it. Rather than just deleting it, I thought I’d go ahead and publish it now before I go ahead with bringing it up-to-date.
*************************************************
July 13, 2014
I interrupt this intended thread of Club Scrap stamps to use for pocket page cards to bring a report of … A little progress in actually getting started setting up some albums! Woo hoo!
This weekend I attended a local scrapbooking retreat — Scrap Sistaz — at the Kierland Westin hotel in Scottsdale with my scrappin’ peeps. I determined to use it to get a start on my pocket page albums for my mom’s photos, finally.
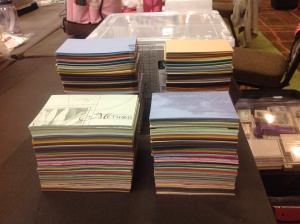
4 stacks of pocket card bases
First step was to create some pocket card bases from some of my vast stash of Club Scrap card stock. I took a stack about 7 inches high of card stock from several older kits, and cut them up into smaller pieces in two sizes: 4″x6″, and 3 1/2″ x 5″ (the latter to accommodate older photos before 4×6 became the default photo size). This photo shows the resulting stacks of the two sizes in both plain and patterned styles..
Then my next favorite activity… Sorting and organizing them by color! I’ll revise this post to include photos of their storage boxes tomorrow after I photograph them.
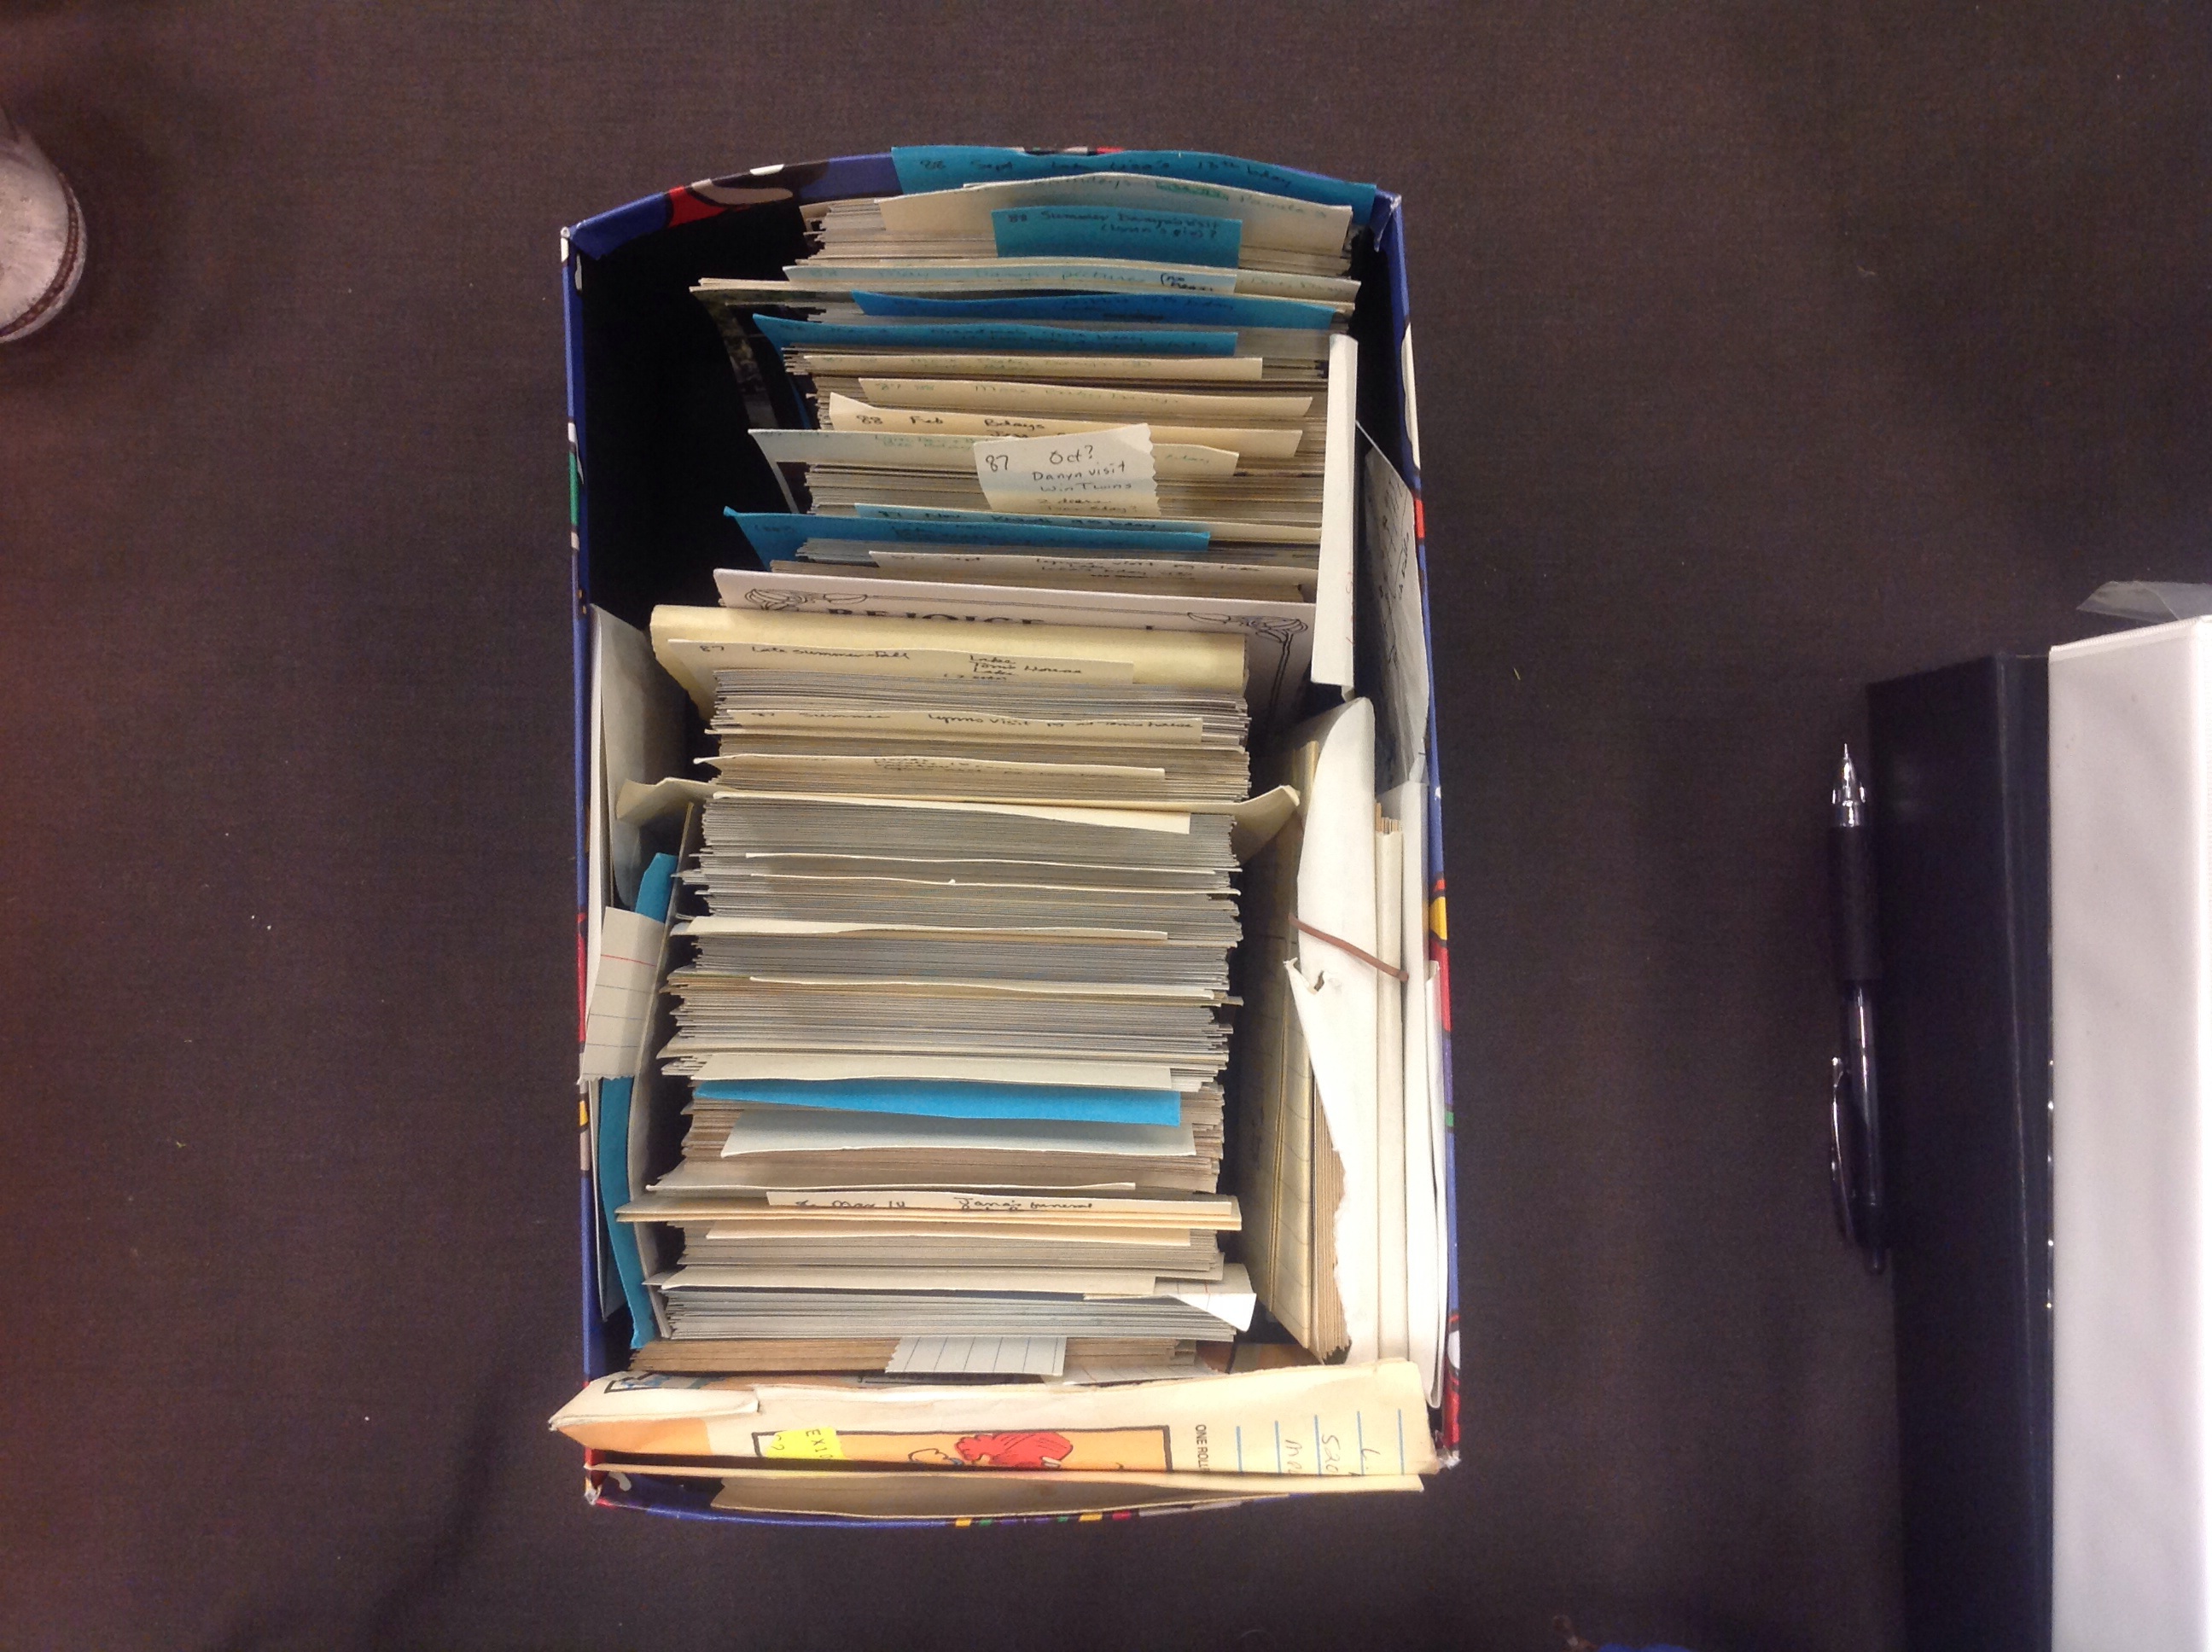
First box of photos
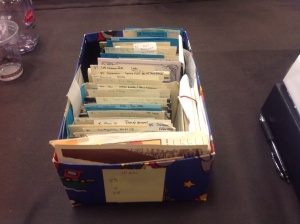
Showing divider tabs In chronological order
I came prepared to start stamping and decorating some cards, but decided to postpone that step until I had some actual pages ready to incorporate them. That forced me to take a deep breath and tackle the step I had been avoiding for the past 14 years– actually start working my way through the photos: they are packets in pretty much chronological sequence to start with, but often with duplicates I had to pull out and set aside to give to the other siblings. And then thin down the stack by tossing repetitious and bad shots, too. That took up much time.
In the end, I managed to work through about 3/4 of the first of many boxes, and set up pocket pages to fill the first one and a half albums. I just inserted the photos and left spaces for the journaling and decorative pocket cards to be added later. This way, I was refreshed about what themes I will need the cards to be designed around–so far, birthday, Christmas, outdoors, etc.
Pocket Page Scrapbooking #2
Okay, I’m just too gosh darned excited about this to get anything else done (I’m supposed to be job hunting…). I needed to get started on collecting materials that will help me use Club Scrap supplies with Pocket Page Scrapbooking, so here we go…
In this post, I’m focusing more on a subset of possible pocket page cards–the journaling cards–as opposed to the decorative filler cards in the first post.

2012 Weekly Chronicles unmounted rubber stamps
First off, actually Club Scrap did initiate an entry into this realm when they came out in 2012 with their “Weekly Chronicles” line of products. Of course, I grabbed up their offerings at the time, and remarkably enough, they still have some of these products available! I urge anyone who has not indulged in these supplies yet to hurry up before they’re gone forever!
There is the sheet of unmounted stamps–here–, and also still available are some digital templates if you’re into digi or hybrid–here and here.
So these stamps can take care of one important aspect of pocket page cards… being able to record specific days, dates, times, etc. on little journaling block cards.
But what I felt I needed in order to REALLY get going with pocket page scrapbooking were two more elements:
- I felt we were missing (or rather, kind of “light” on) some stamps that provided lines or grids for handwriting journaling on the cards; in sizes that would accommodate 4 x 6 cards and 3 x 4 cards, in both horizontal and vertical orientations;
- And thirdly, not missing, but … just “scattered” around amongst all the graphic stamp images, were ones to use for making frames and borders on the cards. I want to collect those in one place.
So that’s what I’m attempting to start gathering here… today I’ll post a little taste of a few of the gems I dug out of the archives of stamps and stencils:

Workbench grid wood-mounted stamp (August 2005)
Here’s the one stamp that immediately came to mind that would work well for quick-and-dirty grid stamping… from the Workbench kit of Sept. 2005. Now, even with using a stamp positioner, I didn’t have much success yet in extending cleanly the lines further in one direction for filling out a rectangular pocket card. So I would wish CS could someday come up with some of these type of stamps in rectangular shape, for 4×6 and 3×4 size cards…
I will be posting more in this category later, as I have kept an index of “lined” images from all the past stamp images. Just wanted to get rolling with this one. If you have this one, it will serve well enough to start. Especially if used with not a black ink, but a more faded color, such as grey ink or a pastel color matching your cardstock. Tone on tone would be cool; so as not to compete with the ink color used in handwriting the journaling text on them.
As for the square shape on rectangle shaped cards, I’m sure it won’t be a problem to fill in the extra open space with either decorative graphic images, or other embellishments such as flowers, brads, fibers, etc.; such as Ariana did on the samples I posted yesterday.

Monthly calendar grid wood-mounted stamp, from the Retreat 2003 kit.
And then there’s this one that would be good for use on 4×6 and larger cards, for creating customized monthly calendar cards … from the Retreat 2003 kit. There is a miniature version of this grid, that would work on 3×4 cards, on the Unmounted Borders & Backgrounds stamp sheet from that Retreat kit. (In addition to unmounted month name stamps and weekday name stamps that will fit in this larger stamp.)

Language of Love wood mounted frame stamp (Feb 2000)
Okay, those get us started with the grid/lines need. Next up is frames/borders. As I mentioned, I kept an index of these things that I’ll dig from and post later, but to get started I wanted to show these old-but-goodies: here is a frame stamp from the Language of Love kit (February 2000). I realize that not many people might have this stamp; if you ever see it on Ebay, snatch it up!

Language of Love frame stamp combined with Workbench grid stamp
And here’s how it would look combined with the grid stamp, just for kicks…

Frame stencils from the Varsity Junior kit (June 2005)
And finally I wanted to end today with an often overlooked resource–the collection of stencils we’ve received in our monthly Club Scrap kits. This one immediately came to mind for pocket cards, because it was originally intended to fit ATC cards, which are just a tad smaller (2.5″ x 3″) than the standard 3×4 pocket cards–so dimensionally they fit very well…
I hope to put together some samples shortly so you can see how these all work together; as well as post some additional samples from the archives of Club Scrap papers, stamp images and stencils.
New interest — Pocket Page Scrapbooking
I’ve been experimenting with the idea of incorporating pocket page scrapbooking in with my traditional way… it began with the coolest workshop class in last year’s annual Club Scrap Retreat, where we made an Instant Album using the pocket page method. (Sometimes called “Project Life” method, after Becky Higgins resurrected this method in the past few years, bringing it into the current 12 x 12 size albums, and expanded it from there.)

2 of the 12 pages from the Club Scrap Instant Album Retreat Class
That class sure did whet my appetite for more ways to use our Club Scrap materials in this way, and I’ve been kind of obsessed with it ever since last August. While I prefer to continue scrapping my own photos the traditional way, I’m thinking the pocket page method would be a big boost in tackling my mom’s photos. There are a ton of them waiting, and they don’t have a lot of information with them. So just very simple, quick albums like the pocket pages ones would really help speed the process of getting them done.
I love the Project Life system, and the many kits that not only Becky Higgins offers, but also those offered by the now many other companies that have jumped on the bandwagon, too. The problem is, cute as they are, they’re just not my style of artwork, which is why I latched on to Club Scrap in the first place.

Ari’s Club Scrap Equestrian pocket cards, set 1
Next in my evolution of thought about this system was being blown away when I saw a friend of mine at a crop in Tucson show me her pocket page cards she had made with the contents of her Club Scrap “Equestrian” kit. They were so beautiful; it had not yet occurred to me that we could just cut up our paper kits into 4″x6″, 3″x4″, or many of the other small sizes that are now being used in pocket page albums! Just never crossed my mind!

Ari’s Club Scrap Equestrian pocket page cards, set 2
I recently asked Ariana if I could take some photos of them to remind me what they looked like, and she graciously agreed. I hope you like them, too.
She also had done the same thing with the “Serenity” kit, and I photographed those, as well.
Anyway, I’ve parked these photos here for inspiration and future reference when I get going on my mom’s albums. I want to suggest that if any of you out there have also used your Club Scrap stash for making these kind of pocket journaling and decorative cards for pocket pages, I would love to see them. Unfortunately I doubt that the comments area on this blog is set up to insert your actual photos, but if you could post a link to where you might have your photos stored, that would be the next best thing. I think this might be a neat place to collect a whole bunch of these kinds of cards.
In the next blog post, I will share more of my ideas on using Club Scrap materials for pocket page scrapping. My mind is racing with ideas! (And so is Ariana’s!)

Ari’s Club Scrap Serenity pocket page cards, set 1

Ari’s Club Scrap Serenity pocket page cards, set 2

Ari’s Club Scrap Serenity pocket page cards, set 3

Ari’s Club Scrap Serenity pocket page cards, set 4
Week 6 “Boot Camp” Challenge — Framed
Well, there’s a lapse of time since my last post! Been quite busy…
On to this post… my entries for this week’s challenge for Club Scrap’s “Assembly Line Boot Camp“: 5 cards utilizing the stamps from the current “Trees” collection. I used my overflowing stash of Club Scrap cardstock and Connie Stewart’s technique called “Flash Cards”…


I would have done more, but got interrupted…
Retreat 2013 Project: Desk Organizer
Well, it’s time for a post on my annual trip to Paper Mecca, Club Scrap’s annual Retreat I went to in August, but while I’m assembling photos for that, I thought I’d post about one of the projects this year, which was inspired by a project suggested by … moi …!

Here’s my finished project… I will be making a second one, modified a bit to hold ink pads, and they will sit side by side on my work table
I thought it might be interesting to share how something like this comes about. Here’s the genesis of that project…
Back in mid-February, I was doing something that I only did a couple of times — and never since! — browsing around Pinterest. I came across a post of a neat idea, a hand-made desk organizer.
http://stempeleinmaleins.blogspot.com/2012/01/desk-caddy.html . I thought it was pretty cool, and that a variation of it might make a cool Club Stamp project, so I forwarded the idea on to the powers that be at Club Scrap. I was surprised to get a response that they were interested to research it! So that made me even more interested, and I began working on a sample of what I had in mind. I cut out several little “cubes” and varied the heights of them…

Beginning organizer cubes I started out with in 3 different taller heights.

So far, so good. Looking pretty useful…
I thought it worked pretty well, but that it needed some more cubes to hold smaller items that would get hidden and difficult to retrieve if put in the taller cubes. So I made a shortie version, and thought it would be good for gelatos and glitter glue, etc. …

Adding on some “shortie” cubes, too
So I made more of them to surround the taller cubes in the middle. I almost went all the way around–that would be 12 shortie cubes–but stopped to consider that I would really LOVE somewhere to store my rulers, too–and especially Club Scrap’s 8″x8″ ruler. So I just make up my own “pocket” to insert behind the taller cubes. Originally I was going to continue attaching shortie cubes around the back of the ruler pocket, too, but in the end, the square geometric configuration was interrupted by the addition of a 1/2″ wide ruler pocket; and also, I figured that doing that might make the whole thing look too big and cumbersome. So I left it with the 8 shortie cubes, and the ruler pocket forming the back side…

I covered a piece of chipboard for a base, and even intended to put it on a lazy susan base, but never got that far! LOL

So that’s how my prototype looked, and I was proud of it, so I sent it off to Club Scrap. Tricia even mentioned that it had retreat project potential! Woo hoo! I was so stoked! I really, really wanted to make a blog post about it back then, in February, but in case it turned out to really be used at the Retreat, I didn’t want to spoil the surprise, so I waited.
So I was very happy at Retreat to see that they had indeed taken the idea and worked it into a special project like only Club Scrap does. I’m much happier with their version, because the chipboard sides made it much, much more sturdy. Even though Club Scrap has the thickest cardstock, the back ruler pocket as I had made it would end up taking a lot of abuse by the rulers, and would in time, tear somewhat. But not in that beautiful Retreat version!
You know, there are so many ready-made desk organizing tools available on the market today. But when you’re a paper artist, it just feels so much neater to use one that you made with your own hands! Thanks, CS, for making such an awesome project!
(p.s.: These projects are now available for sale HERE if you want to make one yourself! I don’t think they will last very long, though…)
Baby Wipe Technique
Wow, how time flies when you’re having fun! (Or, challenging adventures…) Shortly after the July post, I was diagnosed with breast cancer, so crafty things kind of had to take a back seat for a while. Not to worry, though–it was caught very early and very small; lumpectomy went very well. Genetic testing showed I’m at low risk for recurrence, so I won’t need chemo, fortunately. I’m feeling great, have my energy back now (although it may not last, because I start radiation next week for 6 weeks; we’ll see how the energy level holds up.)
So I thought I’d take advantage of this weekend to squeeze in a challenge or two over on the Club Scrap Community forum. They’ve got several different challenges going at the moment; I had to close my eyes and pick one. the “baby wipe” technique won out. Except I didn’t have any baby wipes! Well, I did unearth a package of dried up ones, which I “reconstituted” with water; I guess it worked out okay. Tonight I just made 4 quick and simple cards with this technique…

Card bases: Club Scrap “DIY” kit; mattes: “Fruit and Vine” gold; white cardstock: stash. Stamps: “Autumn Splendor” Club Stamp unmounted stamps; sentiments: “Comics” and “Orient Express” unmounteds.
 I’ve been pretty overwhelmed with non-creative stuff the past few months, so I decided to take a break and play with Classygirl’s online scrapping event Wednesday night. (Tiare Smith is Club Scrap’s Guest Designer for this month.) Her challenge was to use a sketch to make a layout (and a card with leftovers) along with her during a live streaming event.
I started out fine, (even was excited I was not experiencing any of the technical glitches that seemed to plague others with the live event…) BUT got interrupted toward the end by some phone calls, and never did get to work on cards with the leftover scraps; perhaps I’ll add that on after I watch the replay!
Here’s the layout I came up with…

I love the Wisteria kit (more of my favorite purple and green floral designs…). Now when I go back and make the cards with the leftovers, I probably won’t make them along the lines of the sketch, simply because I’ll use them for Operation Write Home…
Thanks, Tiare, for a fun exercise. I look forward to next month’s event!
National Scrapbooking Day 2013
Ooops! Got a little behind; I will catch up with my totals in scrapbook layouts during PSL (Pro Scrapbooker’s League), and card making, etc. soon, but first I wanted to upload a video I made about my project organizing my unmounted stamps as my effort for National Scrapbooking Day yesterday…
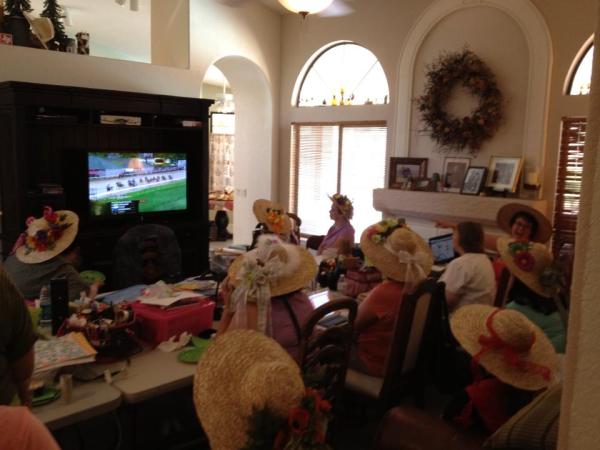
We had a great time at Sindee Looz house, as we do every year. “The Other” Michelle provided a fun opportunity for us all to decorate our own Derby hats, and we all took a break to watch the Kentucky Derby to make fun use of them! We all contributed to the food fest, and we always go away stuffed to the gills. Georgia had a very cute CTMH card project to make the day complete. I always look forward to our annual get together for National Scrapbooking Day!


One more burst…
No time to take and process photos this time, but I did manage to crank out a few more Club Scrap kits to their ALSB’d status yesterday. At a crop at Gale W.’s house in Tucson, I managed to get finished the Serenity Senior (14), Serenity Junior (8), and Peacock Senior (14) kits. I only have today left now to focus on starting the process of digging out photos that will go on all these beautiful layouts! Since that’s the major time-sucker, I better put away the untouched kits and start the photo-assigning process. Tomorrow starts our PSL (Pro Scrapbookers League) challenge of actually putting finished layouts together! Bring it on!
| Stats: | This post | February | Jan. | Cum. 2013 |
| ALSB pages | 36 | 50 | 96 | 146 |
| Completed pages | 0 | 0 | 0 | 0 |
| OWH Cards, CS | 0 | 0 | 12 | 12 |
| OWH Cards, non-CS | 0 | 0 | 0 | 0 |
| Projects | 0 | 0 | 1 | 1 |
Starting off Feb. on the right foot

Pure & Simple Sr kit ALSB (14 pages)
I’m happy I was able to get February off to a good start — Sunday while half-listening to the Super Bowl in the background, I managed to assemble the ALSB (Assembly Line) layouts from the Pure & Simple Senior Club Scrap kit (from April, 2009). As I pulled out the kit and began to go through it, a dim recollection began to surface–that I had raided some of the 8.5″ x 11″ papers back in 2009 when I was making my cool Stationer’s Box; therefore, I had to come up with a few replacements. I’m sure the layouts will all look fine when I get photos mounted on them.
I selected this kit to work on because it contains the perfect colors to coordinate with some photos I want to scrap soon. I recently attended the ribbon-cutting ceremony of the new building of Infusionsoft (a software company that I utilize at work), which is headquartered “down the road a piece” from my house. They had recently undergone a graphic makeover, too, — their new logo colors (and new building interior decor theme) contain pretty much these lovely green and gray colors.
Now I’m all set for the “Pro Scrapbookers League” to get underway, so I can start assembling finished pages. Monday will be the official kickoff for registration, and the following week will begin the 7 weekly challenges.
(FYI, here are photos of the Stationer’s Box I made back in December of 2009, also using these beautiful papers…)
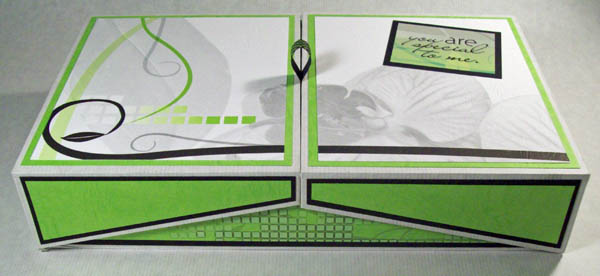
Pure and Simple Stationer’s Box, with matching greeting cards inside

Pure and Simple Stationer’s Box Open
Okay, back to statistics with the latest batch of layouts ALSB’d…
| Stats: | This post | February | Jan. | Cum. 2013 |
| ALSB pages | 14 | 14 | 96 | 110 |
| Completed pages | 0 | 0 | 0 | 0 |
| OWH Cards, CS | 0 | 0 | 12 | 12 |
| OWH Cards, non-CS | 0 | 0 | 0 | 0 |
| Projects | 0 | 0 | 1 | 1 |